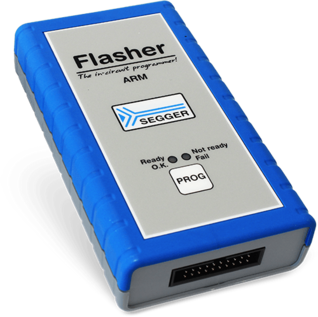
Flasher ARM
Flasher ARM
Production Programmer
Flasher ARM is a programming tool for microcontrollers with on-chip or external Flash memory and ARM core. Flasher ARM is designed for programming flash targets with the J-Flash software or stand-alone.
Flasher ARM connects via USB, Ethernet or via RS232 interface to a PC, running Microsoft Windows 2000, Windows XP, Windows 2003, Windows Vista, Windows 7, Windows 8 or Windows 10 and has a built-in 20-pin JTAG connector, which is compatible with the standard 20-pin connector defined by ARM.
- Stand-alone JTAG/SWD programmer (Once set up, Flasher can be controlled without the use of PC program)
- Ethernet interface
- Supports internal and external flash devices
- Wide range of devices are supported.
- Free software updates, 2 years of support
- 128 MB memory for storage of target program
- Serial in target programming supported
Features
Flasher can be used for programming flash targets with the J-Flash software or stand-alone.
Setting up Flasher for First Use
In order to use Flasher for the first time you need to install the Flasher related software and documentation pack which, among others, includes the J-Flash software and connect Flasher to the host PC via USB.
Power-On Sequence
In general, Flasher should be powered on before connecting it with the target device. That means you should first connect Flasher with the host system via USB / RS232 and then connect Flasher with the target device via JTAG. Power-on the device after you connected Flasher to it. If you use Flasher in stand-alone mode, just power-on Flasher via external power supply.
Verifying target device connection with J-Link.exe
If the USB driver is working properly and your Flasher is connected with the host system, you may connect Flasher to your target hardware. Then start the J-Link command line tool JLink.exe, which should now display the normal Flasher related information and in addition to that it should report that it found a JTAG target and the target’s core ID. The screenshot below shows the output of JLink.exe. As can be seen, it reports a Flasher with 3 JTAG devices connected.
Verifying target device connection with J-Flash
Another way to verify the target connection is to connect to the target using J-Flash. To connect to the target with J-Flash you have to choose an appropriate project file for the target first. After opening the project file choose Target –> Connect from the menu to connect to the target. If everything works as expected, follow the instructions in 2.2 to download a program to Flasher with J-Flash.
Using Flasher with PC Software “J-Flash”
J-Flash is a software running on Windows (Windows 2000 or later) systems and enables you to program your flash EEPROM devices via the JTAG connector on your target system. J-Flash works with any device/core that is supported by J-Link and supports all common external flashes, as well as the programming of internal flash of ARM microcontrollers. It allows you to erase, fill, program, blank check, upload flash content, and view memory functions of the software with your flash devices.
Setting up Flasher for Stand-Alone Mode
In order to setting up Flasher for the “stand-alone mode” it has to be in “J-Link mode”. When the correct connection of Flasher to the host PC is verified start the J-Flash software.
Remote Control of Flasher
Flasher can be remote controlled by automated testers without the need of a connection to PC and Flasher’s PC program. Therefore Flasher is equipped with additional hardware control functions, which are connected to the SUBD9 male connector, normally used as RS232 interface to PC.